
Introduction
I had a problem with SSH authentication. I have my own infrastructure that I need to access remotely using SSH and when it was just a couple servers in my closet, a password was fine.
Then I added a third, and fourth server.
Now I really should be using keys, but then I need to update all the hosts, and where am I going to put the key to keep it secure? The best would be to encrypt the key and keep it in ~/.ssh. Then I still need to enter a password though so the benefit didn’t feel there (even though it is).
Add a NAS. Then an offsite NAS.
This is really getting out of hand.
Cloud infrastructure has joined the fight.
Status: Untenable.
Oh The Problems You’ll Face
So do I just bite the bullet and use SSH keys as above? I could use OpenPGP and a Yubikey but that feels to me gross and add dependence on OpenPGP.
However it turns out SSH now supports smart cards for authentication. You can load a key on it, set some flags and it just works! I experimented with this but quickly ran into show stoppers.
I’m already using the authentication slot on my Yubikey for code signing, so I’d need a separate Yubikey. Even though the Yubikey has 20 (!) extra slots for keys, SSH doesn’t see them.
Even if I weren’t, I might want to use them for mTLS certificates in the future meaning I’d have to erase my SSH keys, or just kick the key security can down the road to when I get there.
I wasn’t too broken up about this though because this solution didn’t solve my other biggest problem: centralized logging.
Maybe I’m just bad at log parsing but looking at the sshd logs gives me two problems:
The log format is complex, and seems to change significantly for slightly different connections. I.e bad password looks very different from bad key. It also appears the full context is spread across multiple lines.
Every host will need to report these logs, meaning every host needs telegraf. Updating anything about logging needs to be updated everywhere or logging breaks. I know this is basically textbook “Use chef” but I’m not there, yet.
A New Challenger: SSH Certificates
SSH certificates are great but they aren’t generally used in home deployments because certificate features like expiration, serial numbers, principals, allowed extensions, aren’t generally important to smaller deployments and just add complexity.
Also while, certificates don’t solve the key security issue, it does solve the logging issue, if I use ultra short lived certificates. Issuing a certificate for 2-5 seconds makes the window for abuse is very small. Even smaller if I can issue the certificate to be valid only for a certain server.
Looking more into SSH certificates I now had the following issues:
I need to write my own SSH certificate authority. There is decent tooling for Go and Python, but not Rust.
It solves the logging problem, ish. A certificate has a list of authorized principals (users you can log in as) but not hosts. So I need a way to enforce that.
Now I need to secure a CA key *and* the local user key. If the CA key is compromised, it’s even worse than stealing a user’s key because it can issue certificates for *any* user.
Even though it sounds like this is even worse than just using chef, these are programming issues, not systems issues, so I was willing to continue on.
First Up: SSH Certificates in Rust
In Rust but there isn’t much SSH certificate tooling. The closest was `sshkeys`, a library which supports parsing SSH certificates but doesn’t validate them. It also doesn’t create new certificates.
Since I was going to be making such core changes to the library, I forked and rewrote most of it. I kept a lot of the parsing code, but added a new private key module, certificate verification and signing, dozens of tests, an example that emulates `ssh-keygen -Lf`, among other things. The result was a new library I called `sshcerts`.
Now we can generate certificates.
Next: Key Security
Key security is one of the whole reasons I’m here so I won’t settle for anything less than keys being protected by some sort of secure enclave.
Now, the Secure Enclave, sounds like a great idea. It’s such a great idea in fact that people have done it. SEKey (also written in Rust) does this and it definitely worked…at some point. It seems the required entitlements to access the Secure Enclave changed and broke the build for Catalina and above so it didn’t work for me. If I’d spent more time on it, I probably could have made it work, but I stopped because it doesn’t have a feature I wanted even more: Attestation.
It’s 10pm. Do You Know Where Your Keys Are?
If you’re managing SSH at an enterprise, when someone registers a new key it’s useful know where that key resides as it helps determine what access it should have. A key generated in a `/tmp` folder, it should probably be less trusted than one in an HSM.
A Yubikey solves this with the Attestation (0xf9) slot. Using a certificate pair in this slot, you can generate an attestation proving a key was generated inside the Yubikey (it will not generate for imported keys). Every Yubikey also comes with a certificate signed by a Yubico Attestation Root CA meaning if you already deploy Yubikeys, this system is already available to you. As an added bonus, this also contains information about the Yubikey itself like the firmware version, form factor, and serial as well as information about the key’s usage policy: touch and pin requirements.
Now I can tie SSH keys to a Yubikey serial number, useful for cross referencing Yubikey serials (and now SSH keys) with deployment data.
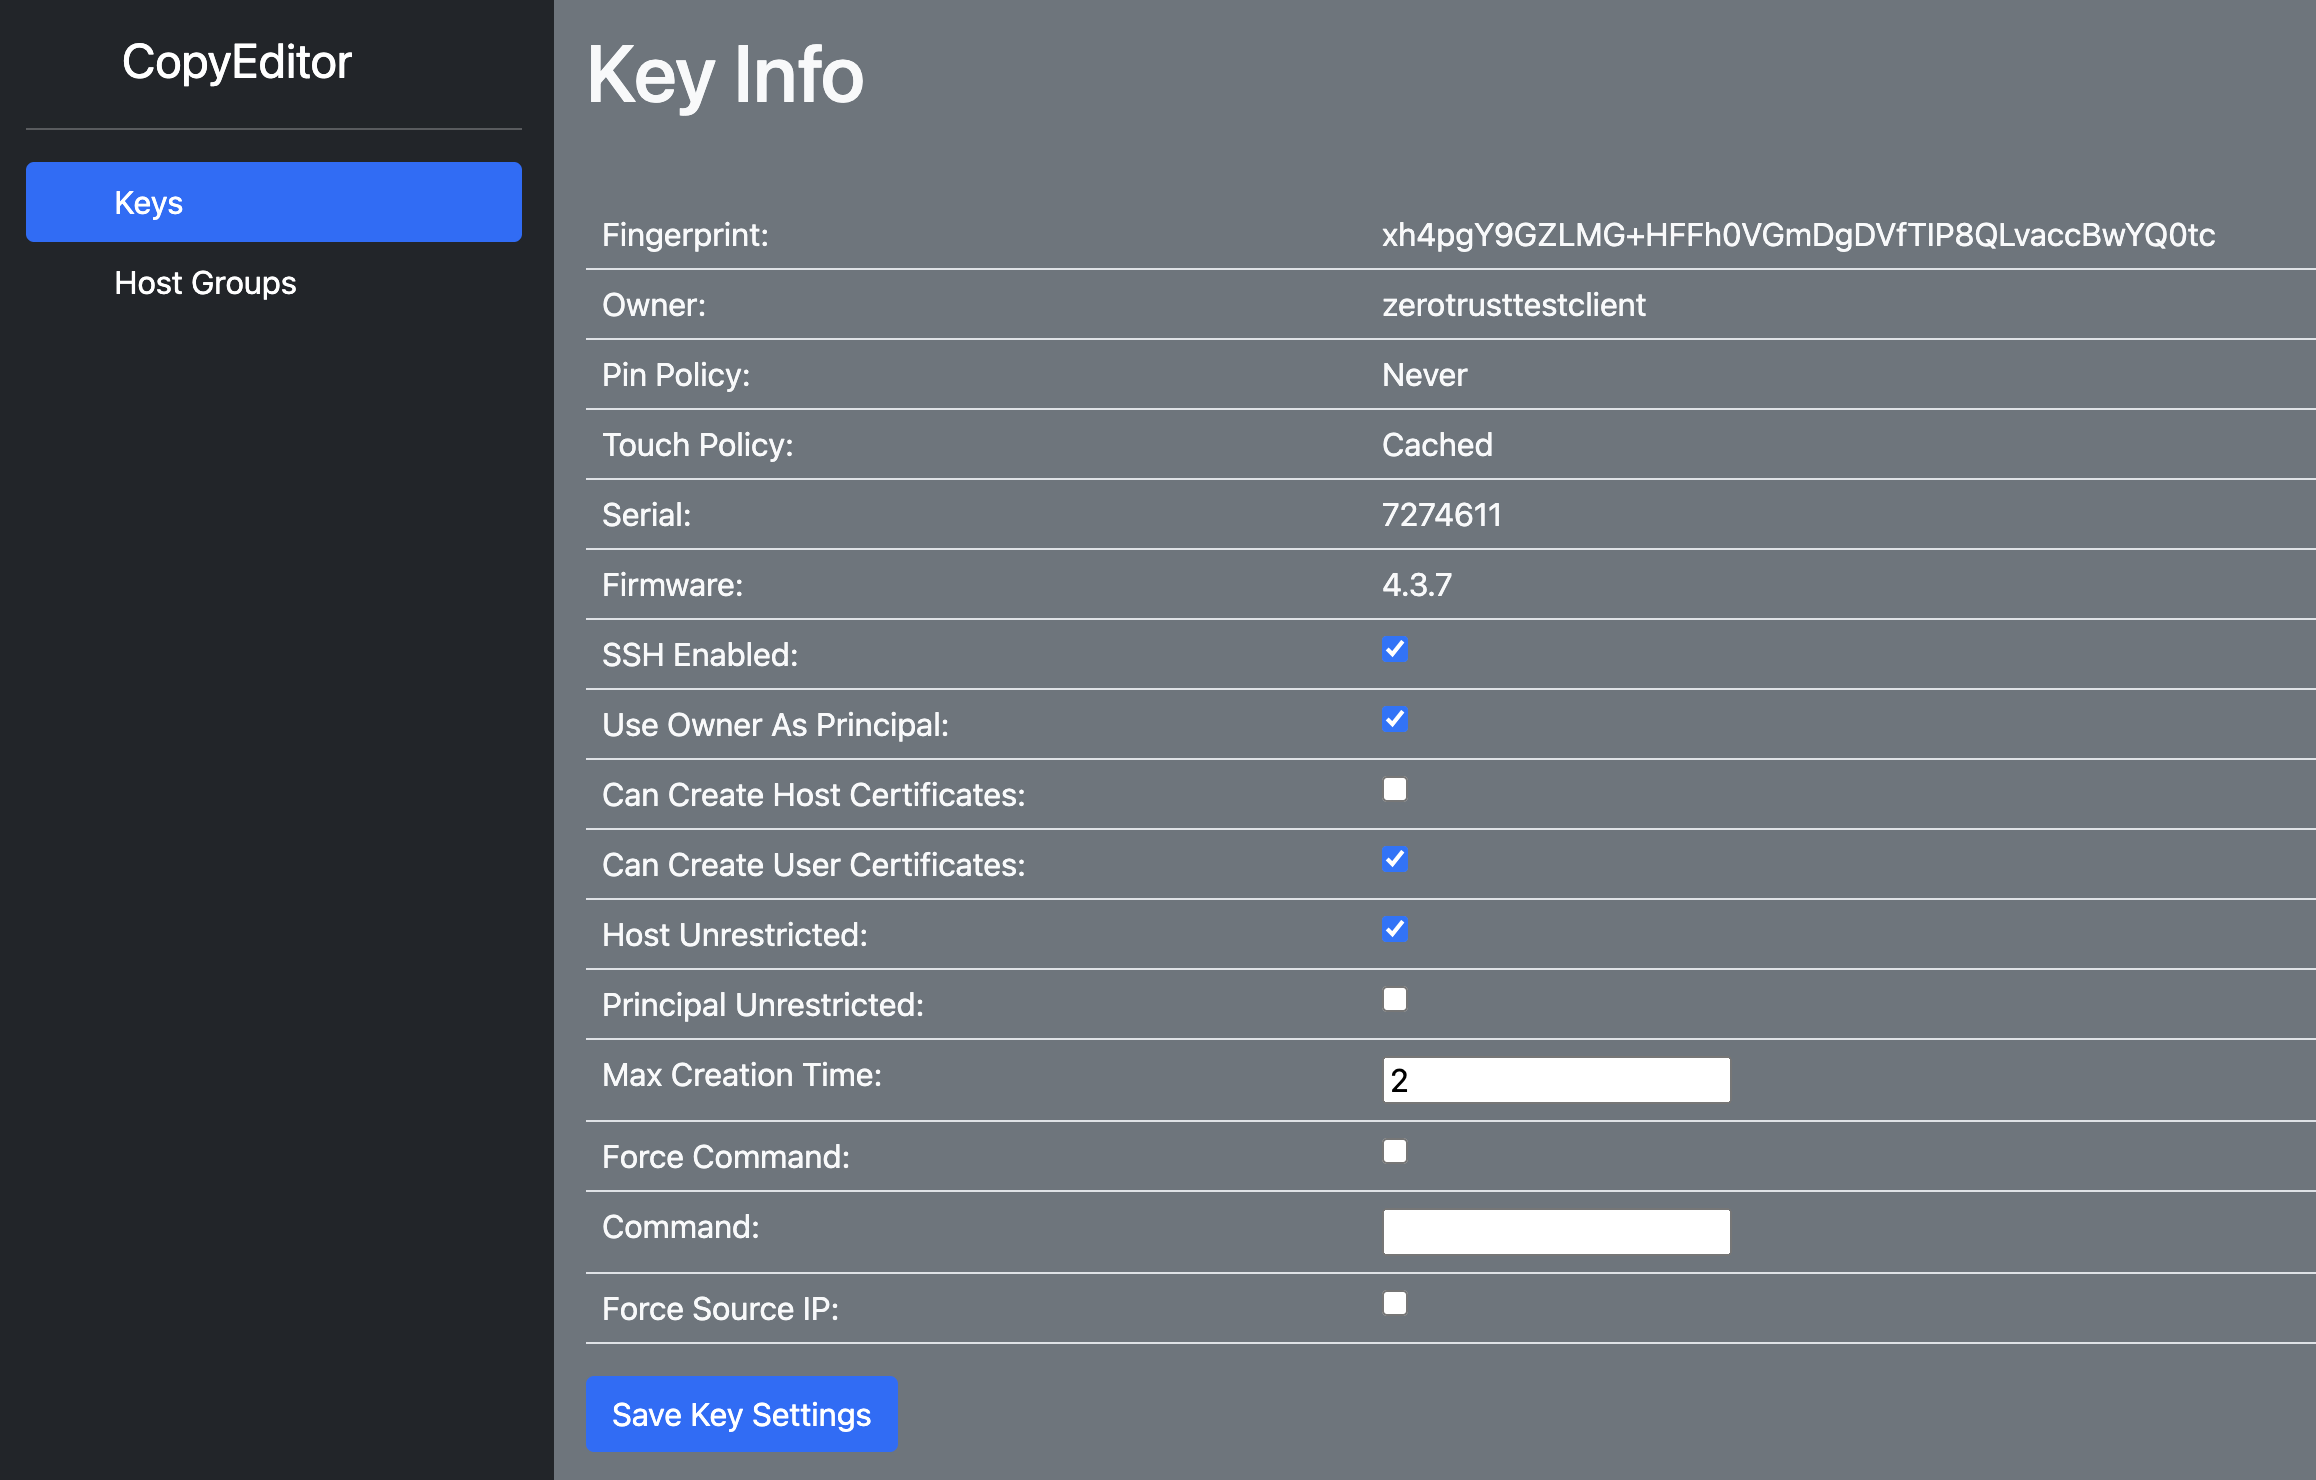
Admittedly, this is not an issue I face with my personal infra as I’m the only one who uses it. But it was so fun to write I created a simple web service around showing this data and being able to toggle SSH permissions through it.
I’m An Agent of Security
I don’t know about you, but I can be lazy. If I have to remember to jump through security hoops every time I want to SSH into a server, I’m going to get frustrated/not do it. Plus those servers may report my failed login, setting off alarms.
I want this system to be as easy as possible. Really I want it to look like this:

Note: The animation above is a lot slower than in real life. Really it’s pretty instantaneous with the longest part being that you need to physically tap the Yubikey.
Then what I want to see in the backend is this:

The simplest way I think to do this is using an SSH Agent. An SSH agent is software that holds keys on your behalf and provides signatures using those keys via a unix socket. You can see this if you run `ssh-agent` at your command line:
SSH_AUTH_SOCK=/tmp/ssh-FcNcQs3GYGP8/agent.1883623; export SSH_AUTH_SOCK;
SSH_AGENT_PID=1883624; export SSH_AGENT_PID;
echo Agent pid 1883624;
This is starting a new instance of `ssh-agent` and then gives you some bash exports telling SSH where to find the socket. This is why it’s generally run through `eval` so these get added to your bash context automatically.
SSH Agents support a number of different calls but we just need two to make this work: listing identities and signing data.
The process is pretty simple, when SSH opens a connection we receive the `list-identities` request via our unix socket. We take this opportunity to grab a new certificate from the server (which will only be valid for a couple seconds) and return it to SSH. If that certificate is accepted, we will receive a `sign-data` request which we sign with the Yubikey and away we go.
This gives the client the ease of use (the first part) while also logging the usage of the key on the centralized server (the second part).
Then Finally: Securing The CA Keys
Securing keys is the most important because a compromise of them results in catastrophic system failure. Thus it was non-negotiable that these had to be hardware backed keys. The only tool I had were Yubikeys (I really didn’t want to pay for a cloud HSM).
Now Yubico’s 500$ YubiHSM2 supports SSH certificates and they even provide a tutorial for it. But I don’t have one and since an SSH certificate is just a signature over the hash of some data, a standard Yubikey will work fine. A bit of tooling later using `sshcerts` and I had a daemon that generated new SSH certificates on demand using a Yubikey slot and could complete an SSH challenge.
How Is It All Put Together?
There are a lot of parts here so here is the final diagram showing how all the parts interact, along with an explanation at each step.

Now this might be more complicated than you were expecting and there is a lot going on here. Here’s the breakdown step by step:
The user initiates a connection to a remote SSH server
SSH contacts the SSH Agent (in this case Rustica Agent) for what identities it should provide to the remote host. SSH does not provide us any information (as far as I can tell) about what host it’s connecting to, just that it wants a list of all our keys.
Rustica Agent checks that it does not a valid certificate already, assuming it does not, it contacts the Rustica server to request one, along with the public key we want a certificate for.
Rustica server returns a challenge to ask the agent to prove it has the private portion of the key.
The challenge is signed using the Yubikey.
The challenge, challenge signature, and requested certificate parameters are send to the server. This will contain the users we would like to receive a certificate for, how long we want the certificate to be valid for, among other things.
The server will make a decision based on its own permission model whether or not grant the request, the parameters from the user are only requests and do not have to be granted (a user might request a principal the server is not willing to give to that user but may return others). It might also check the mTLS identity provided during the connection matches the owner of the public key provided. If request is allowed to proceed, the server will generate, sign, and return to the client, a brand new SSH certificate to be presented to the remote host.
Rustica Agent provides this as the only identity to SSH
SSH forwards this certificate to the remote host
If the remote host accepts that CA, and the principal is allowed, and the certificate is not expired, and the source_ip critical option is obeyed or not present, the remote server will then challenge to the user to prove they possess the private key as well.
This challenge is forwarded through SSH to Rustica Agent
Rustica Agent signs this new challenge using the Yubikey a second time
The challenge response is given back to SSH
SSH forwards the challenge to the remote server and the connection is established.
While that may sound like a lot it only adds two network calls. Most of these steps happen with every SSH connection anyway so adding another couple isn’t a big deal.
Conclusion
I’ve rolled this out across my infrastructure and it’s working great. Having centralized SSH usage is great and since my infrastructure is relatively small setting up Slack alerts for logins was a breeze.
One thing I wish Yubikeys had was a signature counter that could be checked via the attestation certificate. Then I could build alarms for that number incrementing unexpectedly (both for the user and the server).
I will continue to improve, refactor, and add features to Rustica. Below are a list of topics that I just haven’t had time to cover but are already implemented. If you’re interested in hearing more about them, leave a comment, or better still message me on Keybase @obelisk
But Wait There’s More!
I think this post is long enough but here are things that this system implements that I didn’t talk about:
Key registration: how users can remotely add new keys with attestation metadata
Host certificates: Rustica also supports host certificates and my servers rotate them every minute. Useful for alarms.
External Authorization: Rustica probably isn’t the central point of authentication for your deployment so you can have it defer to another service and have that external service tell Rustica what it should do.
Extensions: Allow or disallow certain features of SSH
Critical Options: How to have an SSH key that can only run a single command or only come from a specified IP address.
Host restrictions: How Rustica can allow a principal of root to login to one server but not another using a bash script baked into the certificate.
PassportControl: My macOS GUI tool for managing Rustica Agent.
Different levels of key security: Rustica Agent currently support automatic signing keys or keys that require tap. This data is propagated to the backend via the attestation certificate.
Grafana Integration: Rustica logs to InfluxDB allowing you to easily build graphs and alerts on SSH usage.